
Setting up Canyoning Anchors
Setting up Canyoning Anchors
Setting up Canyoning Anchors is an essential skill to learn if you want to stay safe while canyoning. Most people would probably figure out how to thread the rope through the anchors and get down. However, canyoning is different than rock climbing. Some skills are transferable but the techniques are very different. Similarly, the skills required to descend a canyon are distinct from those needed for rock climbing. It's very easy to recognize a canyoning beginner while in a canyon. The scary part is watching another group descend a canyon with poor skills or even worse, dangerous habits. Poor skills, lack of knowledge, lack of experience, and overestimating your ability is a recipe for disaster.
In this video, you'll learn how to safely set up an anchor for canyoning. Learning to rappel is another skill. It's important to seek professional guidance for all aspects of canyoning. Take a course with a certified canyoning guide, such as Rich at Bigtime Aventura. Learn the basics and then move onto more advanced skills with the help of a trained professional. By trained professional, we are talking about a certified canyoning guide.
Setting up Canyoning Anchors: review the gear
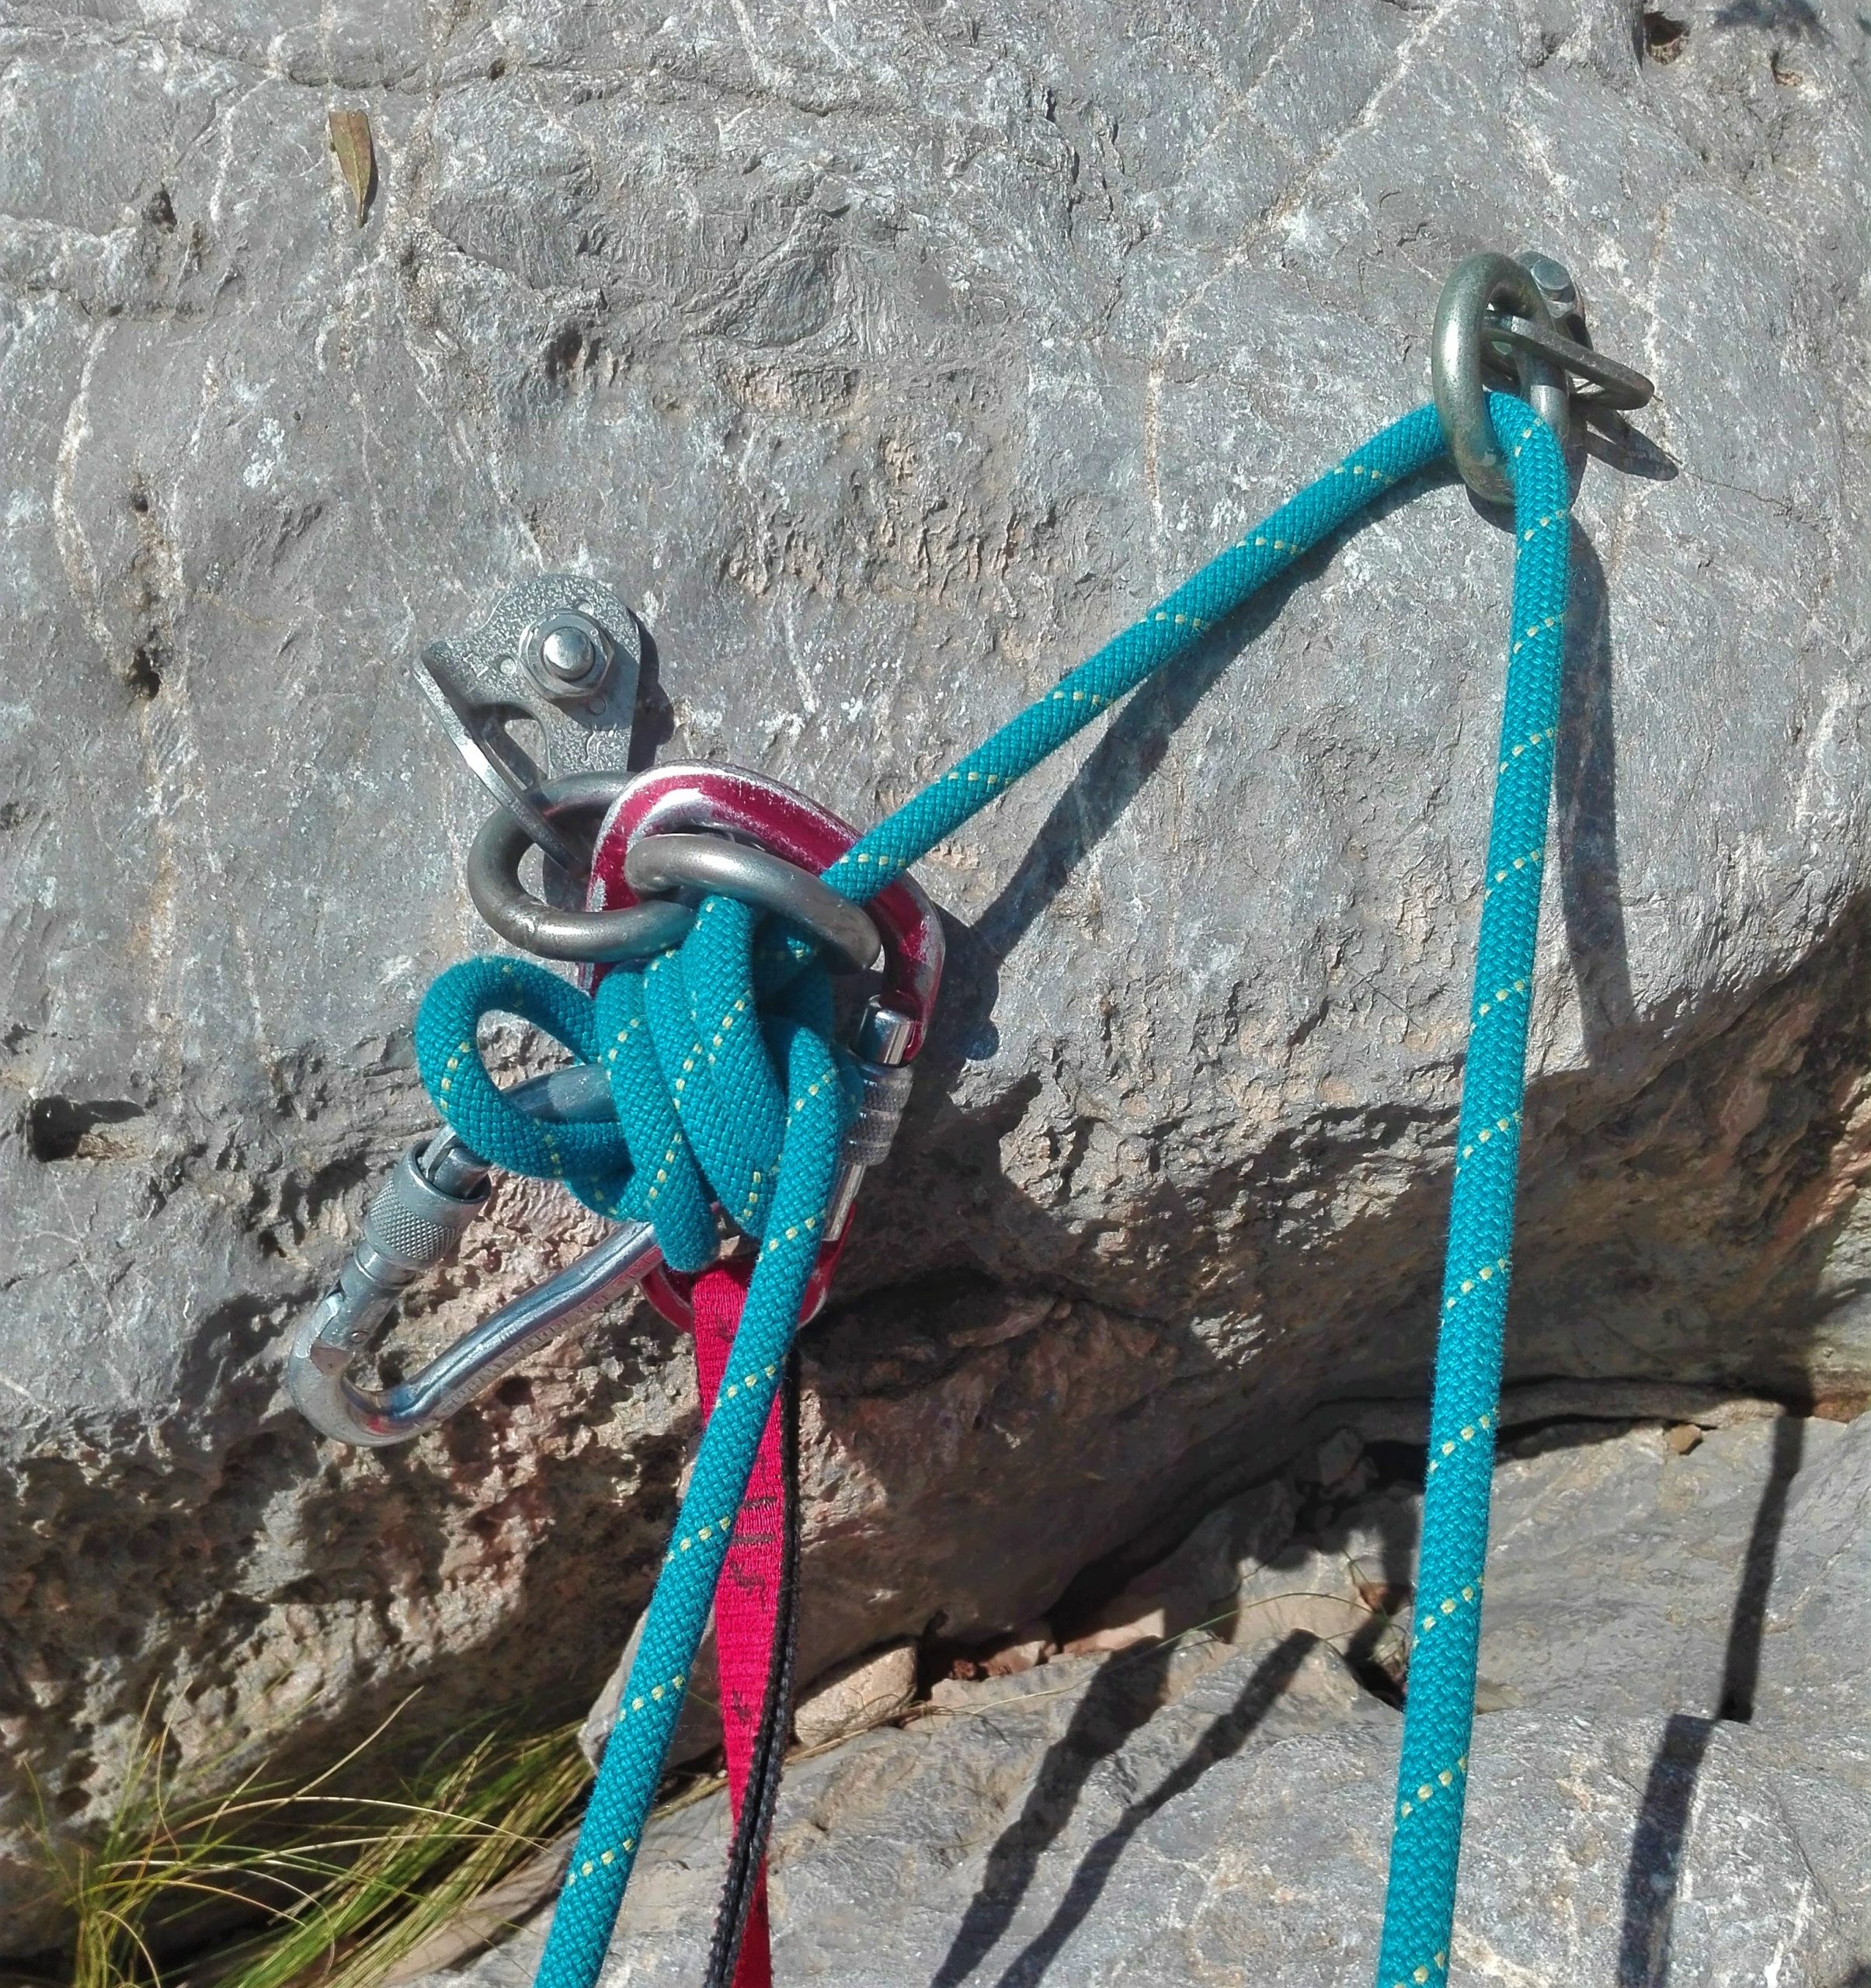
When you reach the anchor, which will be found before a large vertical drop as you descend the canyon, you need to identify the anchor and review it's safety. Usually anchors have two bolts with hangers and rings or quick links. Other typical anchors in Spain and Europe are composed of glue-in bolts. Sometimes these glue-ins have rings attached to them. Once you revise the in-situ gear, confirming that it is in good condition, it's time to set up the rappel.
Setting up Canyoning Anchors: thread the rope
Thread, or put the rope through the rings of both bolts. Usually in canyoning, you only rappel on one side of the rope, a single stranded rappel. Whereas in rock climbing you almost always rappel using both sides of the rope and you put the rope into the anchor until the half way mark of the rope is at the anchor. This ensures that both ends of the rope are equidistant down the rock face. In canyoning, it's not always necessary to rappel on both strands of the rope, you only need as much rope down the rock to reach the ground. So instead of taking out all of your rope and leaving several meters on the ground, simply put only enough rope down the rock until it reaches the ground. Now you have less rope to pack up when you're done with the rappel too.
Setting up Canyoning Anchors: block the anchor
Blocking the anchor refers to one of several methods to make sure the rope is safely blocked on the anchor before you start rappelling. If it wasn't, you would fall to the ground once you weighted the rope. After you put enough rope down the cliff to ensure that it reaches the ground, tie a knot in the rope, on the other side of the anchor. A figure 9 knot on a bight works well here. A figure 8 on a bight is also fine, however the figure 9 uses more rope and is easier to undo when you're done. Clip a carabiner through the bight and also through two of the parallel strands in the knot. This will prevent the knot from over tightening and make it easier to undo when you finish the rappel.
Setting up Canyoning Anchors: pull the rope
Once everyone has finished rappelling, you need to pull the rope to recover it and continue your descent down the canyon. You simply pull the opposite strand of rope that you rappelled on. The knot with the carabiner in it will start to come down and the strand that you rappelled on will go up. Making sure there are no other knots in the rappel strand, it will simply slide through both of the bolts at the anchor and then fall down to you. Pack up the rope in your backpack and continue your descent!
For canyoning adventures, take a look at our canyoning and via ferrata trips in the Pyrenees!