
Figure 8 Follow Through
Figure 8 Follow Through
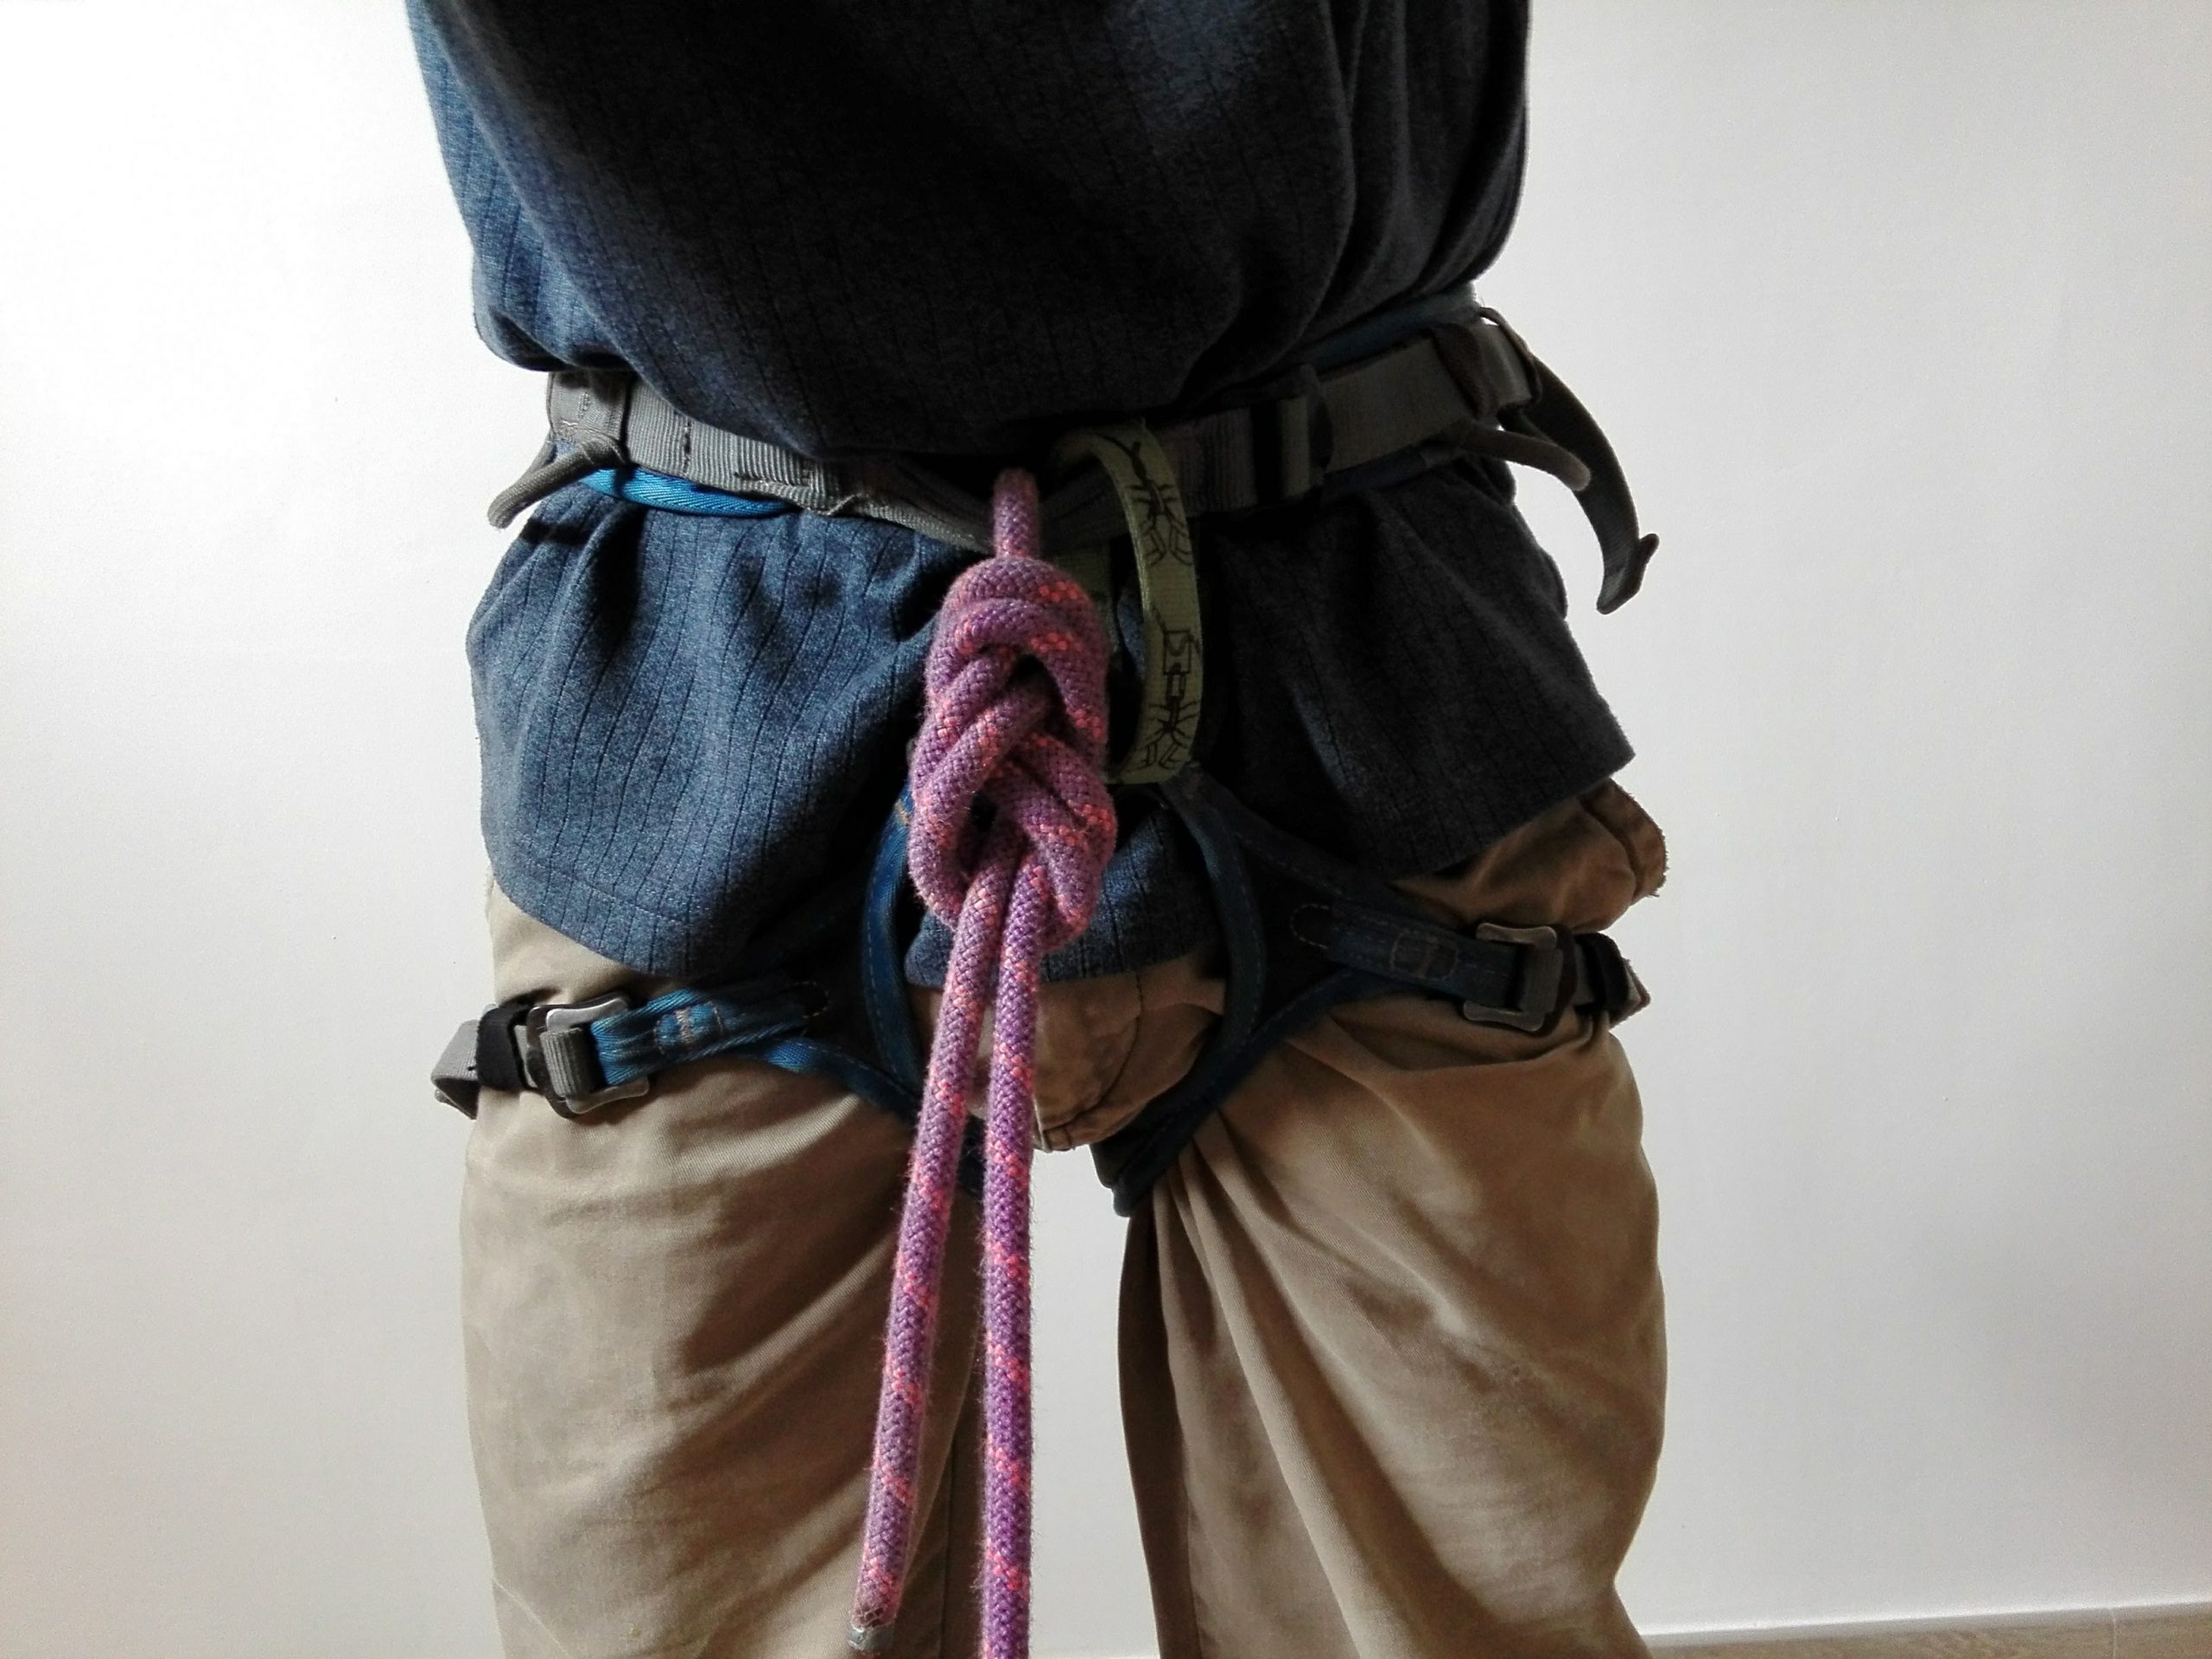
The figure 8 follow through knot, is the preferred and most used knot to connect the rope to your harness for rock climbing. When tied correctly it is secure, highly resistant (strong), and gives you the mental comfort that your knot is not going to come undone while climbing or falling. This is an important psychological aspect of climbing. It is vital that you can trust your gear and your knots so that you can focus on climbing and enjoying the day, instead of worrying about your gear and your knot coming undone.
Tying the Figure 8 Follow Through, Step 1
This video shows step by step descriptions of how to tie the figure 8 follow through knot. It is easier to visually see how to tie the figure 8 follow through so please watch the video. The first step is to find the end of the rope. Either end will do. Measure about 1 m (3 ft) from the end of the rope. Start the knot here. With the end of the rope, place the 1 m of rope over the top of the other strand. Then take the end of the rope and pass it under the other strand. Now bring the end of the rope back up towards yourself and pass it through the loop of rope that you've created. This is the figure 8. It looks like the number 8.
There should be about 1 m between the end of the rope and the figure 8. Take the end of the rope and pass it through the two hard points on your harness. These two hard points are two loops in the front of your harness. The first is the loop that is created by the connection point of the two leg loops of your harness to the front of your harness. This is also the bottom connection point of your belay loop. The other loop is on the waist belt of your harness, right in the center of the waist belt. This is the top connection point of your belay loop.
Tying the Figure 8 Follow Through, Step 2
Take the end of the rope, and start from the bottom loop that connects your leg loops to your harness. Pass the rope through this loop, starting from below and passing it upwards. Start on either side of the belay loop but do not pass the rope through the belay loop. You do not connect the rope to the belay loop. If you start on the left of the belay loop, continue passing the rope up parallel to the belay loop and through the left side of the loop on the waist belt, always staying to the left of the belay loop. If you started on the right, always stay on the right side of the belay loop.
Tying the Figure 8 Follow Through, Step 3
Now, pull the figure 8 close to your harness. With the end of the rope, simply follow the strand of rope that makes up the figure 8, starting from your harness and finishing toward the rest of the rope that is on the ground. The first few times you do this is it easy to get mixed up and not understand the process. Please watch the video for easier visual descriptions. Make sure that all the strands of the rope are parallel to each other and do not cross each other. This is called dressing the knot. It is an important factor. It keeps the knot safe, increases the strength of the knot, allows you to untie the knot easier, and gives you the peace of mind that the knot is tied correctly. It is also easy to visually double check the knot when it is tied correctly. If you have any doubt, untie the knot and do it again.
Tying the Figure 8 Follow Through, Step 4, Double Fisherman's back up knot
In the video, there is some extra slack, about 1 ft of slack rope after the figure 8 follow through is finished. The figure 8 is the primary knot that is going to catch a fall and save your life. To use up the extra slack, we added a double fisherman's knot as a backup. It is always a good idea to incorporate a back up knot, however, it is not 100% required. If you don't use a back up knot such as the double fisherman's, make sure that you leave a long enough tail after the figure 8 knot. That means, leave at least 6 inches of extra rope coming out of the figure 8 knot. Anything less leads to the potential of the extra rope sliding back through the knot and compromising the integrity of the figure 8 knot, which could result in a drastic and even fatal outcome if the knot comes undone.